
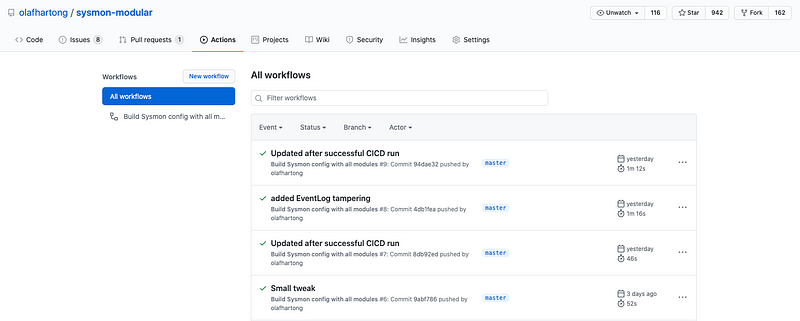
I’ve been maintaining my Sysmon repository for the past 2 years. Every time I made several additions I had to manually generate the attached merged configuration with the supplied script. Truth be told, I’m not the most structured person so in some cases I forgot to do this, leaving a gap that didn’t have to be there.
On top of that, despite the fact that I test most of the pushes I do, there is always a reason a typo can occur in one of the configuration files which breaks the configuration. Thanks to a pull request by Ján Trenčanský that utilised GitHub Actions and generated a downloadable config as an artefact. This sparked the idea to take this a step further by making sure Sysmon actually likes the new configuration as well. Getting this to run on GitHub seemed not the most straightforward task so I started looking for a more convenient solution. This blogpost details the solution I found the easiest to get running, the configuration and tips to make this work.”
Azure Pipelines
Azure Pipelines was one of the logical contenders for me because of the ease of implementation, especially since you require a Windows environment to actually validate whether Sysmon will accept and load the configuration. Another good good reason was; for the intended way of using Azure Pipelines, it’s free! For every open source project you get some free parallel jobs with enough build minutes for all open source projects.
I went to the GitHub Marketplace and added the Azure Pipeline integration and after some authentication flows you end up with a Pipeline environment in the Azure DevOps portal.
At FalconForce we use Azure DevOps for various other projects as well therefore I was already quite familiar with the interface. Azure DevOps also has the possibility to store your Git repositories, which makes some of the later described steps obviously different than getting from and committing to GitHub, but in this case I wanted to retain the place where the project was hosted.
Creating a Pipeline
After creating a new project, which you can choose to be either public or private, you can go to Pipelines and create a new one, doing so will provide you with a selection of integration options for your codebase.
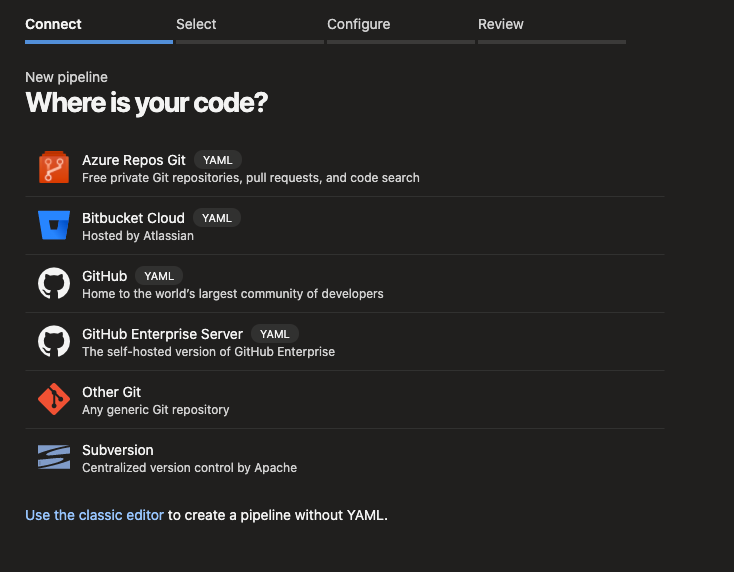
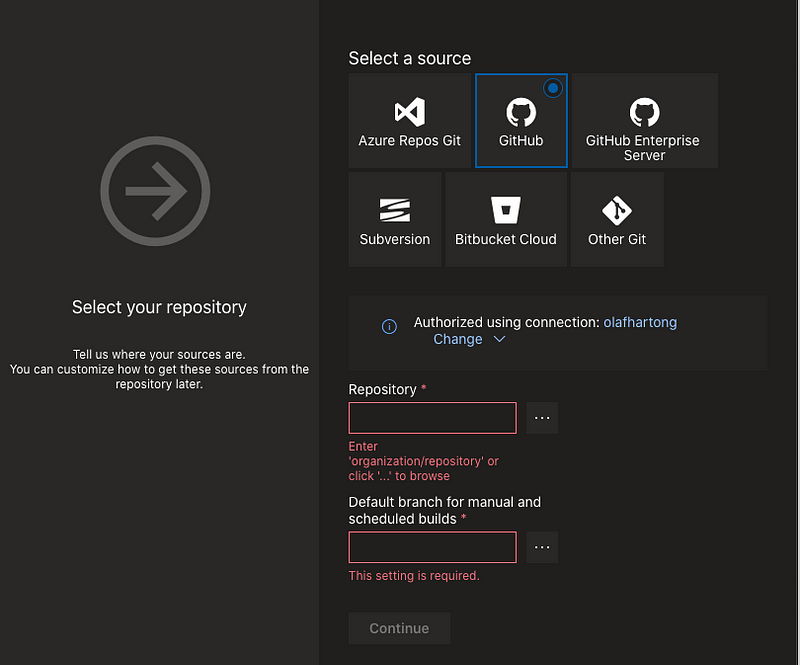
In this case I use the classic editor, select GitHub, and you will need to authenticate to your account. After authentication you can select your repository and the branch you want to use.
On the next step you have the ability to choose from a ton of templates but in our case we start with an Empty job.
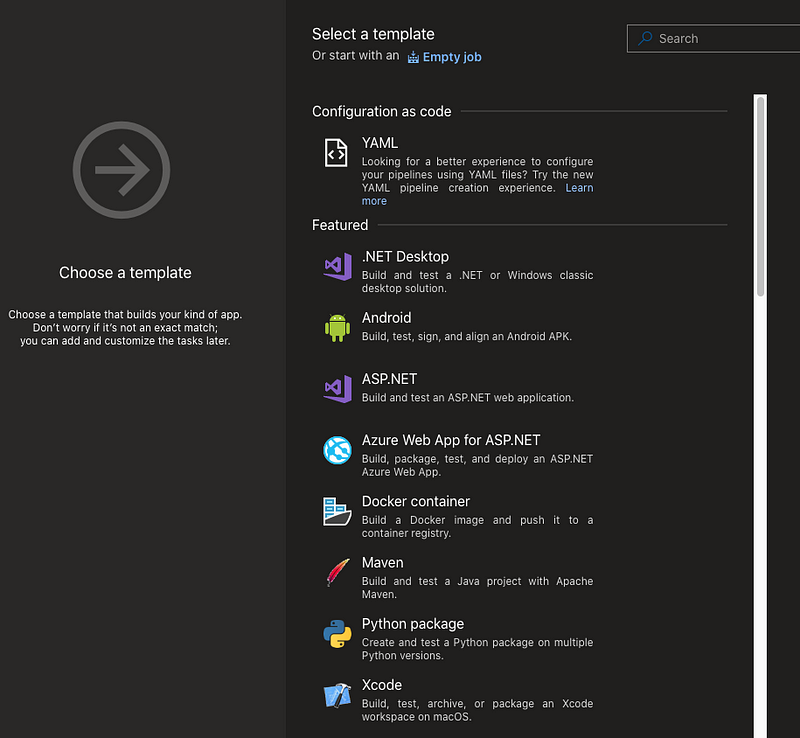
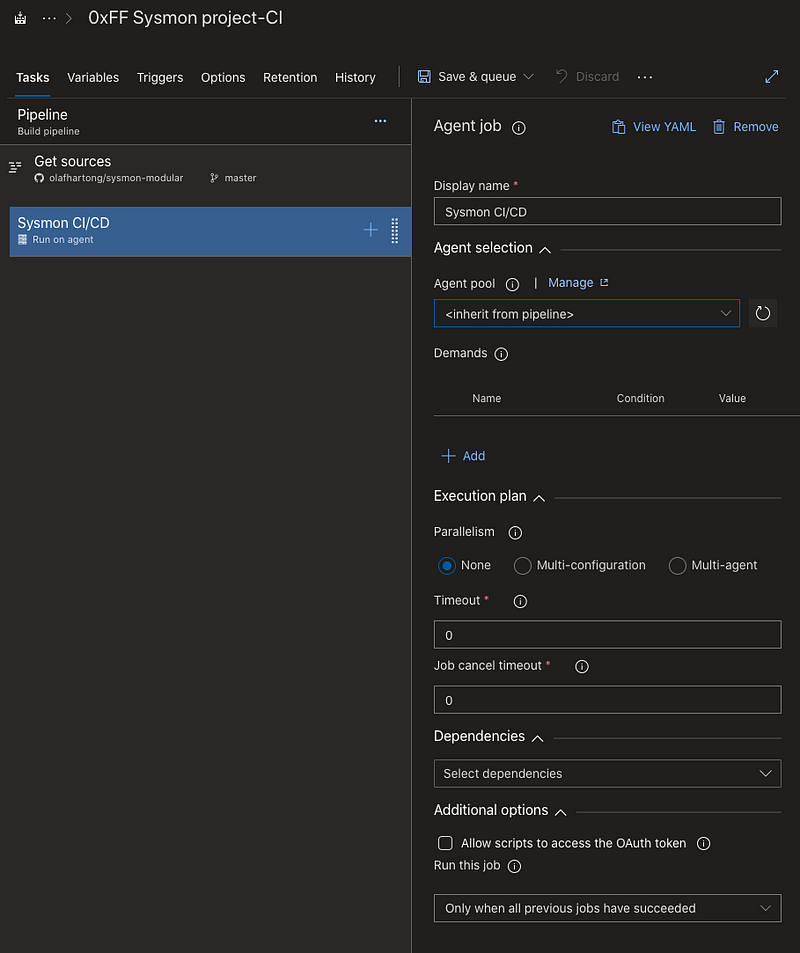
We’ve now created the basic Pipeline which we’ll use to add our steps and achieve the goals set above in this blog. As you can see the first step to get the sources from GitHub has already been defined.

We can now change the name of the Agent job and set some parameters, which in this case are fine by default.
Configuring tasks
The next step creating all steps we require for a proper validation. You could do everything in one step – in theory, but a better practice would be making tasks for each individual step that has the possibility to fail, making it easier later to determine what went wrong once you’ve integrated it.
When you click on the + sign on your Agent job you get a lot of tasks to select from. Since I like to use PowerShell I went with that, thanks to Chris Long for some of his code.
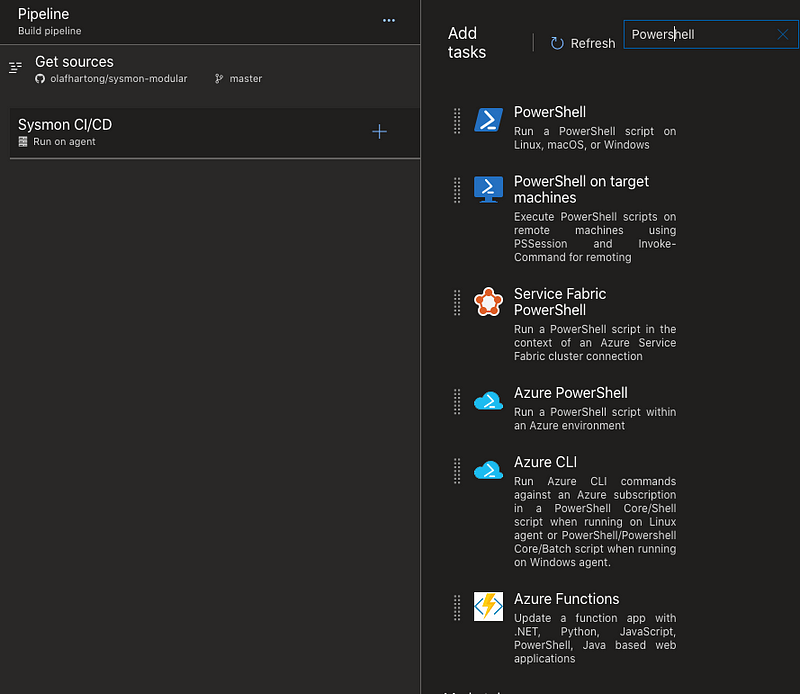
Once added you need to configure it. You can use either pre-built scripts and link them, or as I did: use in-line code. Which you can paste in the Script box.
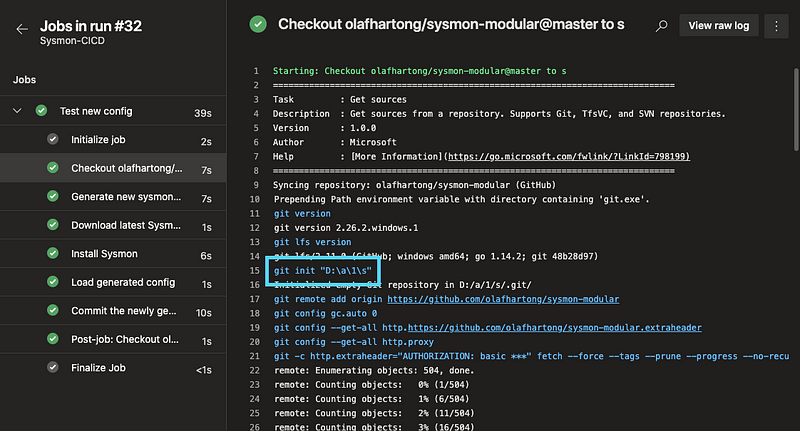
In order to work with my code I had to find out where the cloned Git data was stored first, which I derived from the logs of the Get-Sources step in a test run. This turned out to be D:\a\1\s
Another thing to keep in mind is that it retrieves all branches, so make sure you’re selecting and working in the right one.
Now we know where our repo is stored we can start creating the tasks required to generate and test the merged configuration.
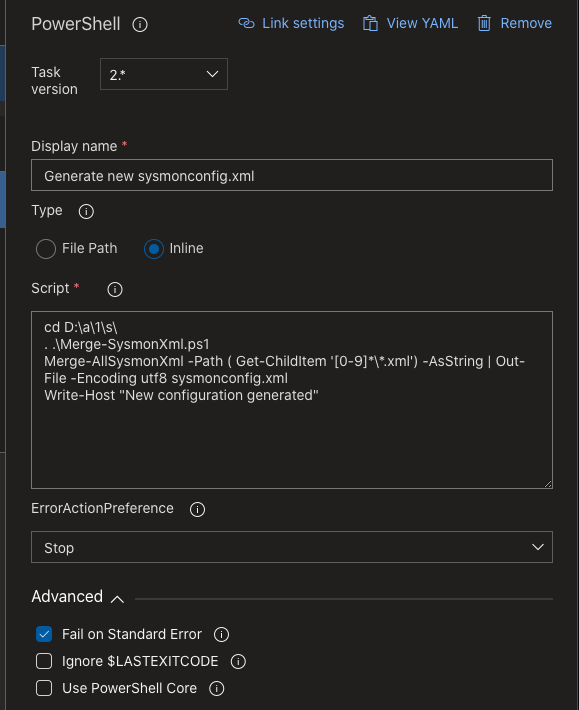
Task 1: Generate new sysmonconfig.xml
Since Sysmon requires one configuration file (not many modules). I have provided a PowerShell script in the repo to merge them into a single file. This might be one of the first tasks that could fail if there is a misconfiguration in one of the config modules so therefore it demands a separate task.
cd D:\a\1\s\
. .\Merge-SysmonXml.ps1
Merge-AllSysmonXml -Path ( Get-ChildItem '[0-9]*\*.xml') -AsString | Out-File -Encoding utf8 sysmonconfig.xml
Write-Host "New configuration generated"
The code above goes to the right directory, loads the PowerShell module to be able to merge, executes the merge and writes the sysmonconfig.xml with the UTF-8 encoding to the same directory and outputs it was successfully generated.
Should it fail for some reason, PowerShell will throw an error which causes the ErrorActionPreference set to stop to kick in. If not it will proceed to the next task.
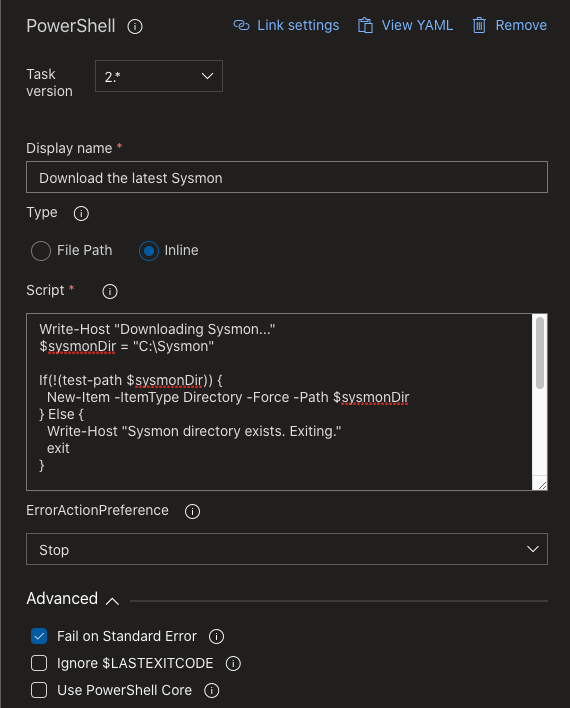
Task 2: Download the latest Sysmon
Write-Host "Downloading Sysmon..."
$sysmonDir = "C:\Sysmon"
If(!(test-path $sysmonDir)) {
  New-Item -ItemType Directory -Force -Path $sysmonDir
} Else {
  Write-Host "Sysmon directory exists. Exiting."
  exit
}
$sysmonPath = "C:\Sysmon\Sysmon.exe"
$sysmonConfigPath = "$sysmonDir\sysmonconfig.xml"
[Net.ServicePointManager]::SecurityProtocol = [Net.SecurityProtocolType]::Tls12
Write-Host "$('[{0:HH:mm}]' -f (Get-Date)) Downloading Sysmon.exe..."
(New-Object System.Net.WebClient).DownloadFile('https://live.sysinternals.com/Sysmon.exe', $sysmonPath)
The second task is no rocket science, it only creates a working directory and downloads the most recent Sysmon binary from the Sysinternals website.
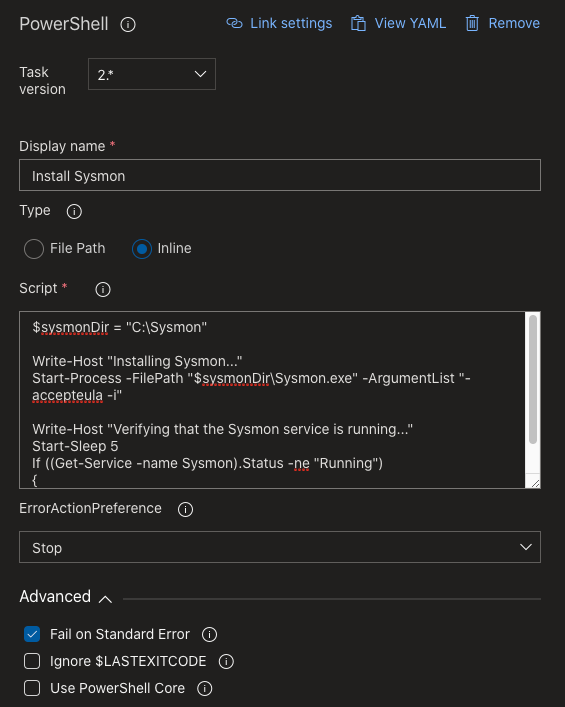
Task 3: Install Sysmon
$sysmonDir = "C:\Sysmon"
Write-Host "Installing Sysmon..."
Start-Process -FilePath "$sysmonDir\Sysmon.exe" -ArgumentList "-accepteula -i"
Write-Host "Verifying that the Sysmon service is running..."
Start-Sleep 5
If ((Get-Service -name Sysmon).Status -ne "Running")
{
  throw "The Sysmon service did not start successfully"
}
Task 3 installs Sysmon and validates whether the service is running. You could have also loaded the configuration on installation, as you would do in a normal environment. However it is something that could also fail and might taint the results irrelevant of the configuration. Because of that it made more sense to separate them.
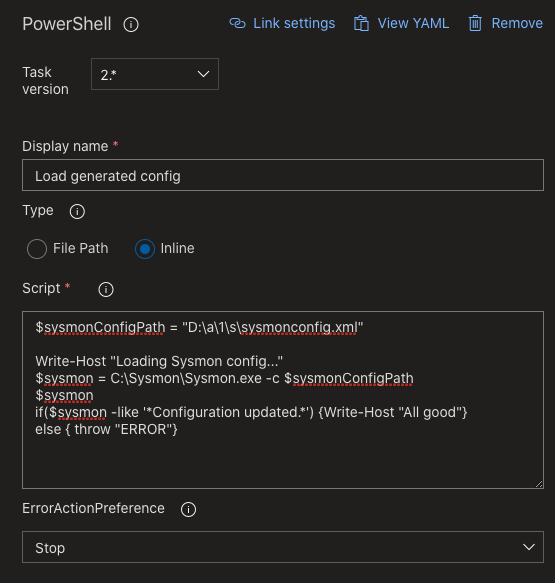
Task 4: Load the generated configuration
$sysmonConfigPath = "D:\a\1\s\sysmonconfig.xml"
Write-Host "Loading Sysmon config..."
$sysmon = C:\Sysmon\Sysmon.exe -c $sysmonConfigPath
$sysmon
if($sysmon -like '*Configuration updated.*') {Write-Host "All good"}
else { throw "ERRORT"}
Finally we get to test what we’ve generated. This script loads the configuration, prints the output to the console for logging purposes and checks whether it contains the Configuration updated line that is only there on a successful load. When this is the case all is good, if not it will fail.
Task 5: Commit the newly generated config back to the Git repo
$date = Get-Date
$env:GIT_REDIRECT_STDERR = '2>&1'
git config --global user.email "[email protected]"
git config --global user.name "Azure Pipeline"
cd D:\a\1\s\
git checkout master
git add sysmonconfig.xml
git commit -m "Updated after successful CICD run"
git push https://[token]@github.com/olafhartong/sysmon-modular.git
When all previous tasks were executed successfully, the valid config will be committed and pushed back to my repo so everyone can benefit from this new file.
In my script I use a Personal Access Token, which resides in this private Pipeline project. If you make this a public project or share it with multiple people, please make sure you use the secret variables.
Testing what you’ve built and enable continuous integration
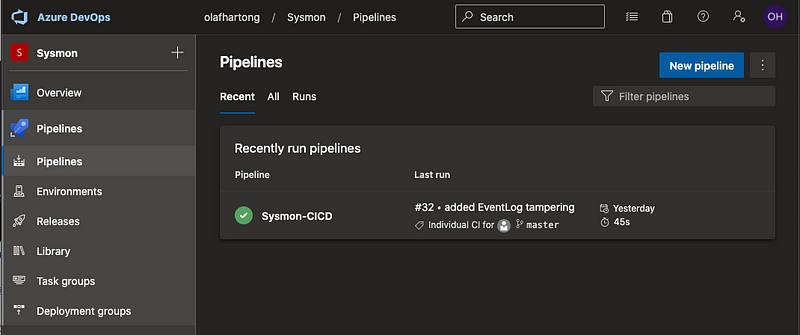
Once you’re satisfied you can Save & queue the pipeline and after a few moments it’ll run. If all went well it should look like the screenshot below.

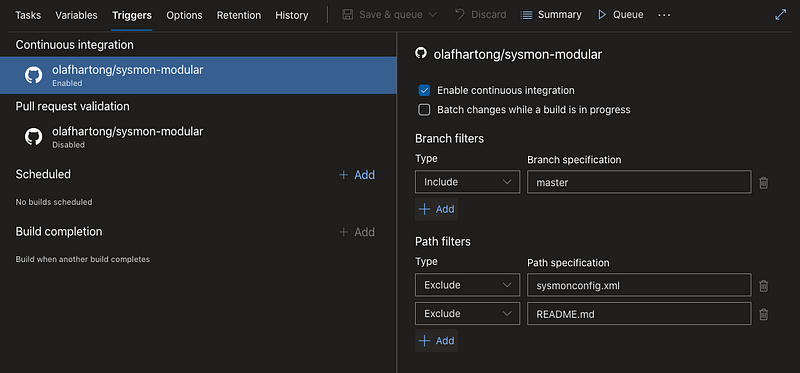
If not you can go to all individual steps and have a look at the console output to see what failed. Once all is working smoothly you can go back to the Edit screen and on the Triggers tab enable the continuous integration, add the proper branch and exclude the files you don’t want to have the pipeline to trigger once edited.
Done
Once you’ve enabled this, any newly pushed code to the repository will trigger the Pipeline to run and execute all configured tasks. By default you’ll get an email with the results. This is obviously configurable to whatever you prefer.
This is a very basic use of the Pipelines, with limitless possibilities. I plan to add some more features to it later to – for example — also generate ATT&CK navigator layers automatically based on the configuration. Another one is to validate whether all Event ID are still being generated, I’m already working on a script for that.
I hope this will inspire you to build similar and probably a lot more advanced projects.
Knowledge center
Other articles

FalconFriday: Need for Speed: going underground with near-real-time (NRT) rules – 0xFF26
[dsm_breadcrumbs show_home_icon="off" separator_icon="K||divi||400" admin_label="Supreme Breadcrumbs" _builder_version="4.18.0" _module_preset="default" items_font="||||||||" items_text_color="rgba(255,255,255,0.6)" custom_css_main_element="color:...

How data science can boost your detection engineering maintenance and keep you from herding sheep
[dsm_breadcrumbs show_home_icon="off" separator_icon="K||divi||400" admin_label="Supreme Breadcrumbs" _builder_version="4.18.0" _module_preset="default" items_font="||||||||" items_text_color="rgba(255,255,255,0.6)" custom_css_main_element="color:...

Microsoft Defender for Endpoint Internal 0x06 – Custom Collection
[dsm_breadcrumbs show_home_icon="off" separator_icon="K||divi||400" admin_label="Supreme Breadcrumbs" _builder_version="4.18.0" _module_preset="default" items_font="||||||||" items_text_color="rgba(255,255,255,0.6)" custom_css_main_element="color:...

FalconForce realizes ambitions by working closely with its customers in a methodical manner, improving their security in the digital domain.
Energieweg 3
3542 DZ Utrecht
The Netherlands
FalconForce B.V.
[email protected]
(+31) 85 044 93 34
KVK 76682307
BTW NL860745314B01